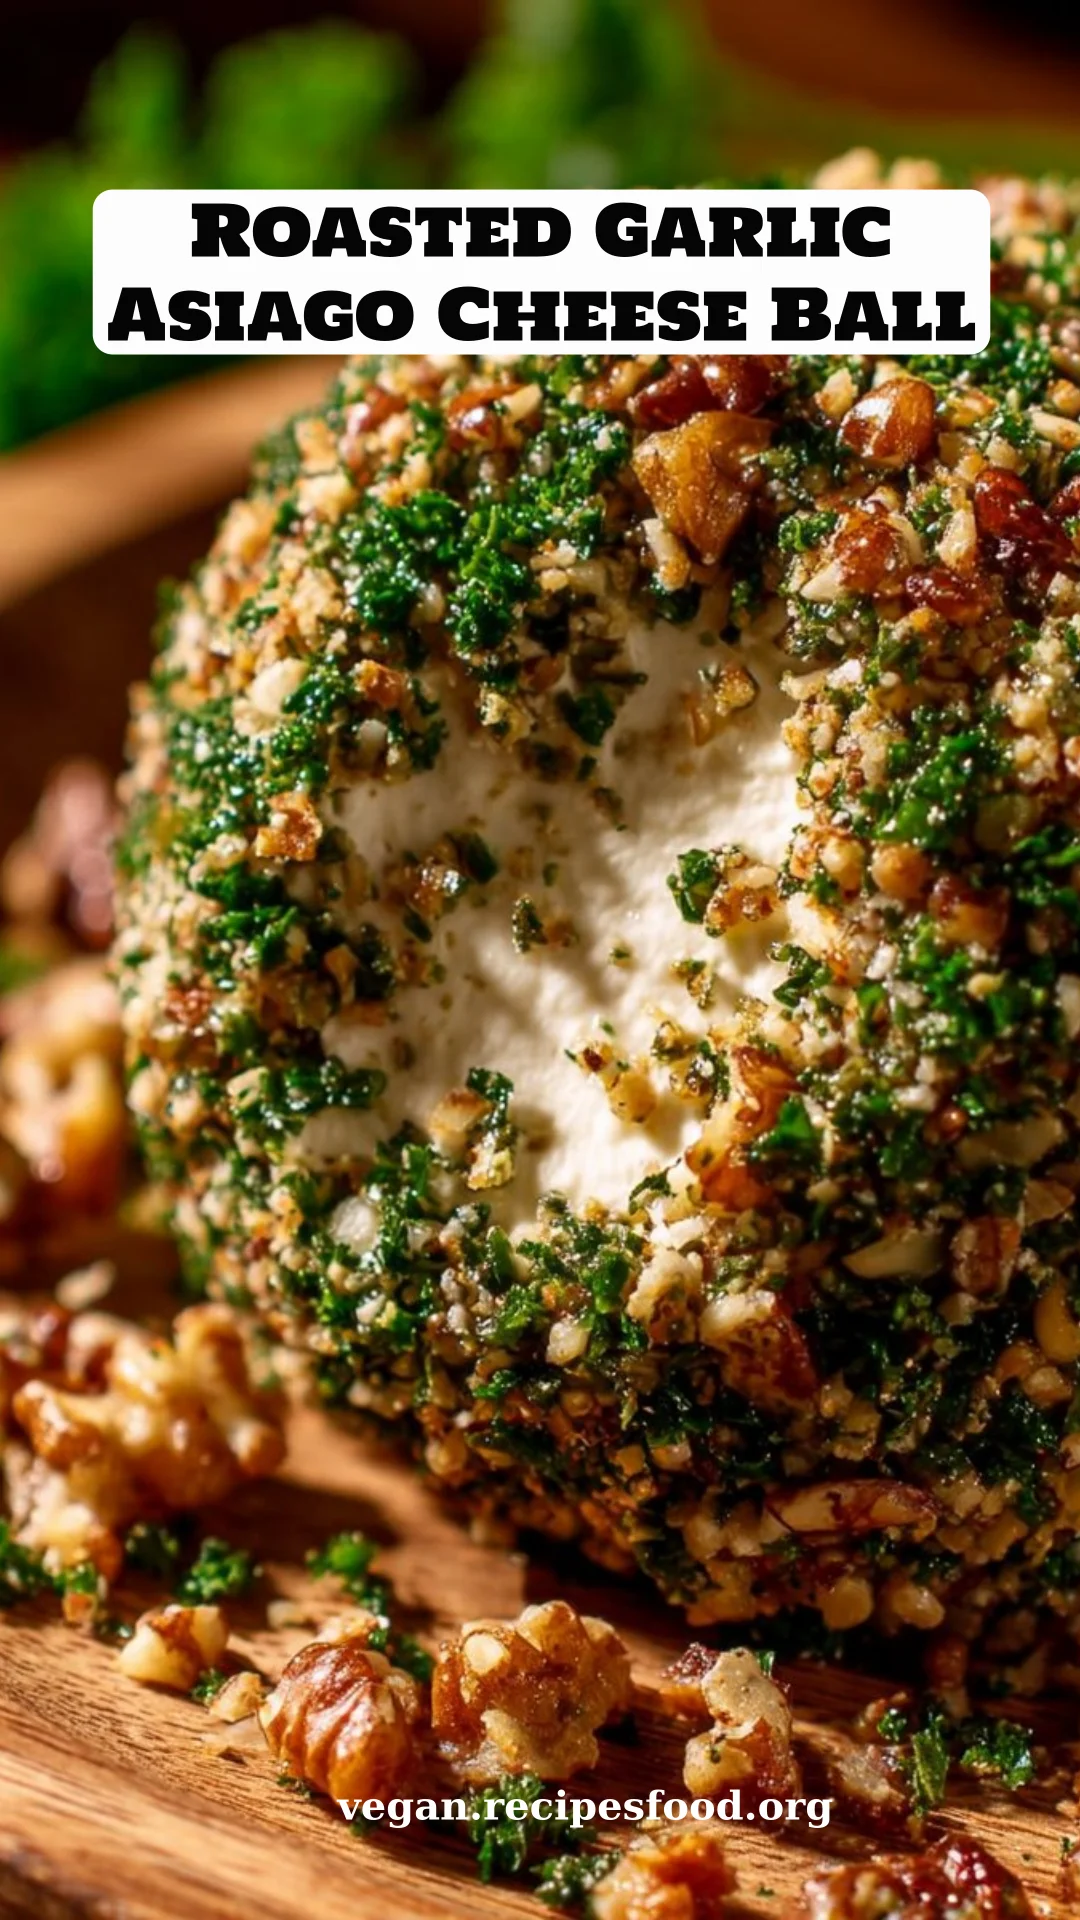
Savory Roasted Garlic Asiago Cheese Ball: A Flavorful Appetizer for Any Gathering
Every time I whip up a Roasted Garlic Asiago Cheese Ball, I’m transported back to family gatherings at my grandmother’s house. Her kitchen was always filled with warm, inviting scents, and one of the highlights was her delicious cheese ball, a creamy blend of flavors that made our taste buds dance with joy. Growing up, I would watch her as she carefully roasted garlic, the aroma filling the air, making everyone’s mouths water. Now, I carry on that tradition, creating my own version that’s just as memorable—if not more so!
What makes my Roasted Garlic Asiago Cheese Ball special? It combines the rich, nutty flavor of Asiago cheese with the sweet, caramelized notes of roasted garlic, and some bright lemon zest to balance it all out. It’s incredibly easy to make and far superior to anything you might find in a store. It’s a simple crowd-pleaser that brings laughter, stories, and love to the table. Yummy memories are created with this recipe, and I can’t wait to share it with you! Stick around, and you’ll not only learn how to make this delightful cheese ball but also some tips to elevate it even further.
What Are Roasted Garlic Asiago Cheese Balls?
Roasted Garlic Asiago Cheese Balls have a rich history in party appetizers, and their origins likely hark back to traditional cheese spreads that were refined in Midwest kitchens across America. This delightful appetizer combines fresh and creamy cheese with roasted garlic’s deep flavors, resulting in a spreadable delight that’s a feast for the senses.
The texture is smooth and creamy, punctuated by the unique, slight crunch of fresh herbs blended throughout. What truly sets this cheese ball apart are the complex layers of flavor—the nuttiness of the Asiago, the sweet caramel notes of roasted garlic, and the lemon zest that adds a tangy twist. These cheese balls are perfect for any occasion, from festive holiday gatherings to casual get-togethers, providing a sophisticated yet approachable choice for entertaining.
Why You’ll Love This Recipe
Deliciously Distinctive: Let’s be honest—store-bought cheese balls can never compare. This Roasted Garlic Asiago Cheese Ball is crafted with fresh ingredients and has a flavor profile that’ll impress even the pickiest of eaters.
Cost-Effective: Making this cheese ball at home is not only budget-friendly but allows you to create something far superior to those pricey artisanal versions. With only a handful of ingredients, you can serve an extravagant appetizer without breaking the bank.
Customizable: Want to add a hint of heat? Try incorporating some crushed red pepper! Feel like a nutty crunch? Roll it in toasted nuts or crispy bacon bits. This recipe is your canvas, so get creative!
Easy to Make: Don’t worry if you’re a kitchen novice; this recipe is very straightforward. In about 45 minutes, you can have a gourmet appetizer that looks and tastes like it took hours to make.
Perfect for Any Occasion: Whether it’s a casual movie night or a festive holiday party, this cheese ball is an all-star in every setting. It looks beautiful on a platter, served alongside crackers, veggie sticks, or crusty bread.
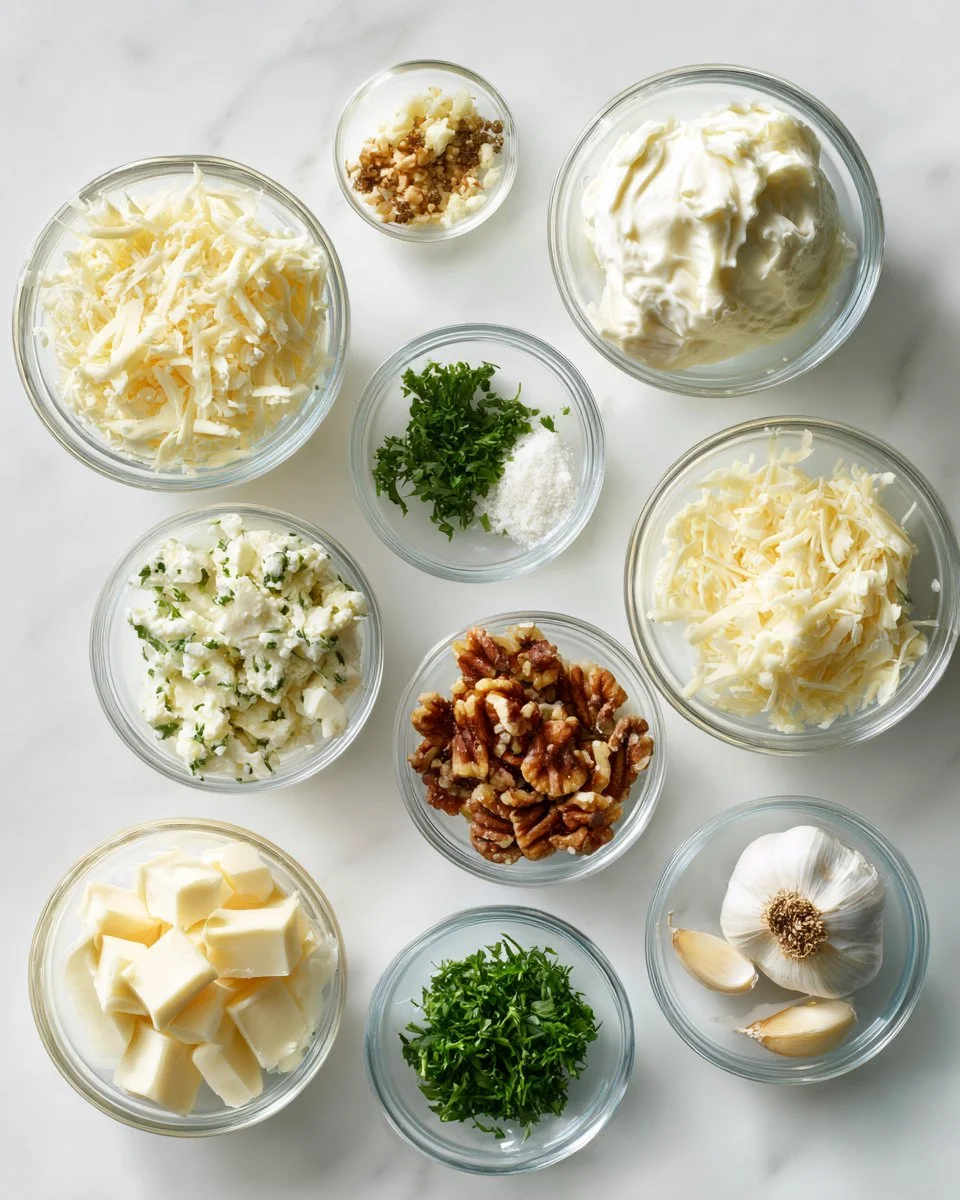
Ingredients
To whip up your very own Roasted Garlic Asiago Cheese Ball, you’ll need:
- 8 oz cream cheese, softened (room temperature for easier mixing)
- 1 cup shredded Asiago cheese (look for high-quality, aged Asiago for the best flavor)
- 2 tbsp mayonnaise or sour cream (adds creaminess)
- 1 head garlic (roasted) or 3 to 4 cloves roasted garlic from a jar (if you’re in a pinch)
- 1 tsp lemon zest (fresh is best for flavor)
- 1/2 tsp kosher salt
- 1/4 tsp black pepper
- 1 to 2 tbsp chopped fresh parsley and chives
Optional Coating:
- 1/4 cup chopped toasted walnuts, pecans, or crispy bacon bits
- 1/4 cup extra shredded Asiago for coating
Serving Suggestions:
- 1 pkg crackers, sliced baguette, or vegetable sticks make wonderful companions to the cheese ball.
Notes on Ingredient Quality/Substitutions
- Always opt for fresh ingredients; they’ll affect the flavor significantly!
- Feel free to substitute the Asiago with another hard cheese if needed, but the unique flavor of Asiago truly makes this dish shine.
Step-by-Step Instructions
Roast the Garlic: Preheat your oven to 400°F (200°C). Slice the top off a full head of garlic, drizzle it with olive oil, wrap it tightly in aluminum foil, and roast for 30 to 35 minutes until the cloves are soft and golden. For a quicker option, sauté 3 to 4 minced cloves of garlic in a bit of olive oil for about 5 minutes until fragrant.
Mix the Base: In a mixing bowl, use a hand mixer or stand mixer to beat the softened cream cheese until it’s smooth and fluffy. Add in the mayonnaise or sour cream, mixing until fully combined and creamy.
Combine the Ingredients: Fold in the shredded Asiago cheese, the mashed roasted garlic (squeezing them out of their skins first), lemon zest, kosher salt, black pepper, and chopped herbs. Taste your mixture and adjust the seasoning as desired. This step is where you can really customize the flavor to your liking!
Shape the Cheese Ball: Lay out a piece of plastic wrap and spoon the cheese mixture onto the center. Shape it carefully into a ball or log using the plastic wrap to guide you. Wrap it tightly and chill in the refrigerator for at least 30 minutes to firm up.
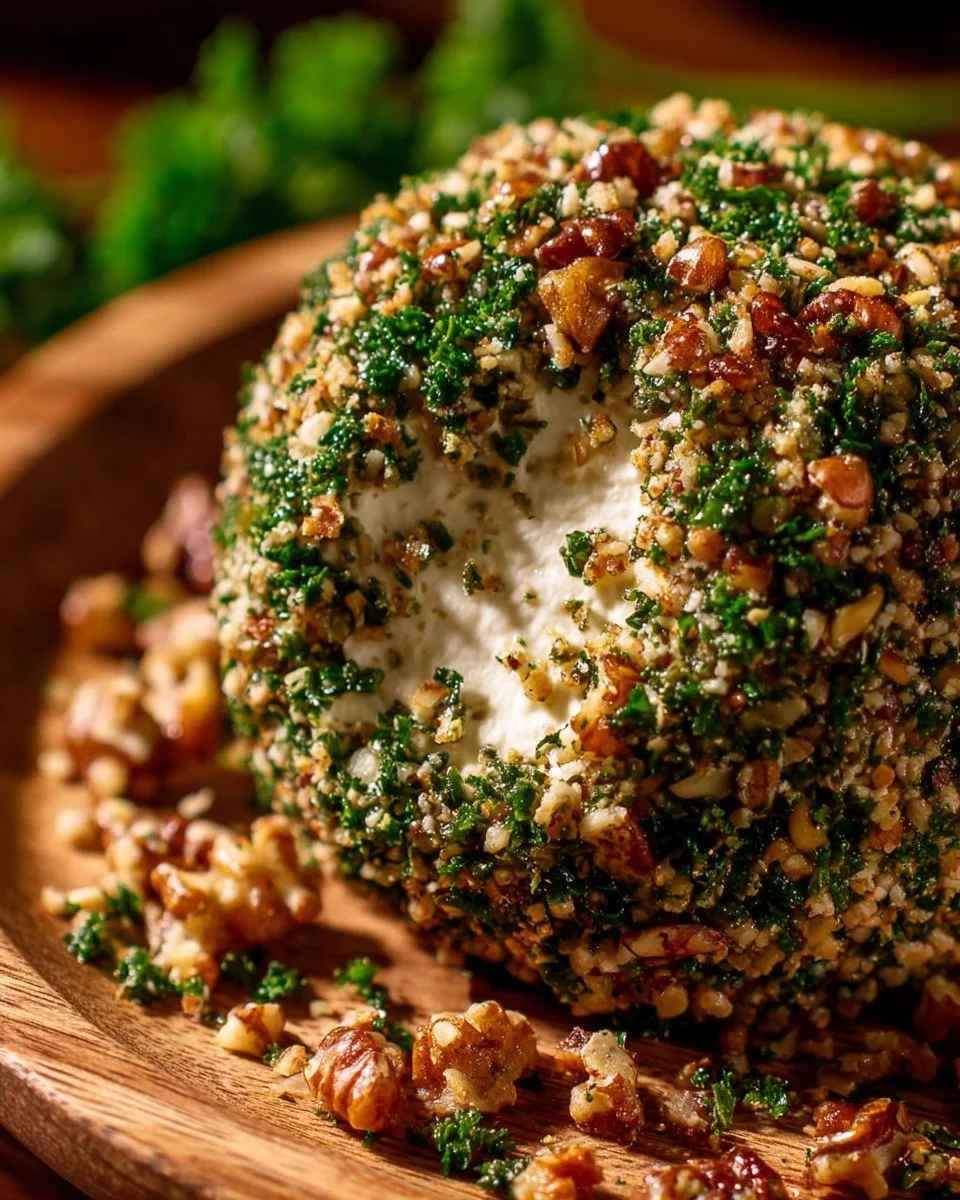
Coat and Serve: Once chilled, unwrap your cheese ball and roll it in your chosen coating, pressing gently to make sure it sticks. Place it on a beautiful platter and serve with crackers, crostini, or veggies. For an even better flavor experience, allow it to sit out for 15-20 minutes before serving, making it easier to spread.
Chef’s Tips:
- Don’t skip the chill time; it really helps the flavors meld and makes it easier to roll.
- Store your wrapped cheese ball tightly in plastic wrap or an airtight container for up to 4 to 5 days, or freeze it for up to 2 months (just thaw overnight in the fridge).
Expert Tips & Tricks
Room Temperature Ingredients: Remember to get that cream cheese to room temperature! It’ll mix so much easier and give you that fluffy texture.
Keep it Fresh: I recommend fresh herbs for the best flavor. Dried herbs can work in a pinch, but fresh really elevates the dish.
Variations on a Theme: Try adding a tablespoon of finely diced sun-dried tomatoes or a hint of horseradish for an unexpected kick. You could also blend in some crumbled feta for added tanginess!
Storage Superstars: Make-ahead this dish! It’s perfect to prepare one day in advance for all your party needs. Just remember to wrap it well!
Common Mistakes to Avoid: Be careful not to overmix the ingredients; you don’t want the cheese to turn gummy. Just mix until everything is beautifully combined.
Serving Suggestions
Pair your Roasted Garlic Asiago Cheese Ball with a variety of options to create a beautiful spread. Fresh vegetable sticks like carrots and celery not only add color but also a refreshing crunch. When it comes to crackers, I love serving it with multi-grain options or crispbread for added texture and flavor. You could even bake slices of baguette until toasty for a gourmet touch.
Presentation is key! Try styling the cheeseball in the center of a wooden or slate board, surrounded by your cracker and veggie options. It’s the ultimate conversation starter—the perfect centerpiece for your next gathering, big or small.
Variations & Substitutions
There’s a whole world of flavors waiting to be explored with your cheese ball!
Sweet & Savory: Add a hint of honey or chopped dried fruits like cranberries or figs to balance the savory flavors.
Seasonal Flavors: In fall, think about adding some pumpkin spice; in winter, some cranberries for a Christmas vibe.
Dietary Adaptations: If dairy is a concern, look for vegan cream cheese and cheese options, as many brands are now available that still allow you to enjoy this flavor combination.
Nutrition & Storage Info
- Prep Time: 10 minutes
- Cook Time: 35 minutes (if roasting garlic)
- Total Time: 45 minutes
- Yield: Approximately 8-10 servings
- Estimated Calories: Around 120 calories per serving (depends on size and ingredients used).
Storage Instructions
- Room Temperature: Best enjoyed as soon as possible once it’s been brought to a gathering.
- Fridge: Keep it wrapped tightly in plastic wrap or an airtight container for up to 4-5 days.
- Freezer: Can be frozen for up to 2 months. Thaw overnight in the refrigerator before serving.
FAQ Section
Can I use fresh garlic instead of roasted?
Absolutely, but roasted garlic offers a sweeter, more mellow flavor that blends beautifully.What can I use instead of Asiago cheese?
You can substitute it with Parmesan or Pecorino Romano, but the flavor will differ!How can I make this cheese ball ahead of time?
Prepare the cheese ball and roll it in your coating; wrap it tightly and store in the fridge for up to 24 hours before serving.Is it possible to freeze the cheese ball?
Yes! Wrap it tightly in plastic wrap, and it will last for up to 2 months in the freezer. Just be sure to thaw in the fridge overnight before serving.Can I serve the cheese ball hot?
While it’s typically served cold, you could serve it warm with some warm bread or pita chips.Can I make this without herbs?
Absolutely! Omitting the herbs won’t ruin it, but if you love that fresh flavor, consider adding some Italian seasoning.What’s a good alternative to cream cheese?
Vegan cream cheese works great for a dairy-free option, and it offers a similar texture.How do I know when the garlic is roasted properly?
You’ll know it’s done when the cloves are soft to the touch and golden brown.Can I eat it right after making it?
You can, but allowing it to chill in the fridge for at least 30 minutes really helps the flavors develop.What’s the best way to serve it?
A lovely platter with a mix of crackers, baguette slices, and crunchy veggie sticks creates an attractive and tasty ensemble.
Conclusion
This Roasted Garlic Asiago Cheese Ball isn’t just a recipe; it’s a moment of joy that brings friends and family together. Its creamy texture and punchy flavors will make it a beloved addition to your gatherings. I invite you to give this recipe a try—I’d love to hear how it turns out for you!
Take a look around the blog for more fabulous appetizer ideas, and don’t forget to leave your feedback or your own tweaks to the recipe in the comments. Happy cooking!
Print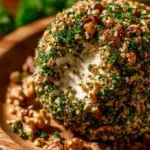
Savory Roasted Garlic Asiago Cheese Ball
- Total Time: 45 minutes
- Yield: 8-10 servings 1x
- Diet: Vegetarian
Description
A creamy and flavorful cheese ball with roasted garlic and Asiago cheese, perfect for any gathering.
Ingredients
- 8 oz cream cheese, softened
- 1 cup shredded Asiago cheese
- 2 tbsp mayonnaise or sour cream
- 1 head garlic (roasted) or 3 to 4 cloves roasted garlic from a jar
- 1 tsp lemon zest
- 1/2 tsp kosher salt
- 1/4 tsp black pepper
- 1 to 2 tbsp chopped fresh parsley and chives
- Optional Coating: 1/4 cup chopped toasted walnuts, pecans, or crispy bacon bits
- Optional Coating: 1/4 cup extra shredded Asiago for coating
- Serving Suggestions: 1 pkg crackers, sliced baguette, or vegetable sticks
Instructions
- Roast the Garlic: Preheat oven to 400°F (200°C). Slice the top off a head of garlic, drizzle with olive oil, wrap in foil, and roast for 30-35 minutes.
- Mix the Base: Beat the softened cream cheese until smooth; add mayonnaise or sour cream, mixing until combined.
- Combine the Ingredients: Fold in the shredded Asiago, mashed roasted garlic, lemon zest, salt, pepper, and herbs. Adjust seasoning to taste.
- Shape the Cheese Ball: Spoon mixture onto plastic wrap; shape into a ball or log. Wrap tightly and chill for at least 30 minutes.
- Coat and Serve: Unwrap and roll in your chosen coating. Serve on a platter with crackers, crostini, or veggies.
Notes
Make-ahead option: Prepare the cheese ball and store in the fridge for up to 24 hours or freeze for 2 months.
- Prep Time: 10 minutes
- Cook Time: 35 minutes
- Category: Appetizer
- Method: Roasting and Mixing
- Cuisine: American
Nutrition
- Serving Size: 1 serving
- Calories: 120
- Sugar: 1g
- Sodium: 300mg
- Fat: 10g
- Saturated Fat: 4g
- Unsaturated Fat: 5g
- Trans Fat: 0g
- Carbohydrates: 4g
- Fiber: 0g
- Protein: 3g
- Cholesterol: 20mg
Keywords: cheese ball, appetizer, roasted garlic, Asiago cheese, party food