Irresistible No-Bake Vegan Peanut Butter and Jelly Bars: A Wholesome Treat to Satisfy Your Cravings
There’s something distinctly magical about childhood food memories, wouldn’t you agree? I can still vividly recall those warm afternoons, racing home from school, eager to sink my teeth into a classic peanut butter and jelly sandwich. The way the sweet jam danced with creamy peanut butter was nothing short of blissful! Fast forward to today, and I’ve recreated that nostalgic joy in the form of No-Bake Vegan Peanut Butter and Jelly Bars.
These beauties are not just a healthier twist on a timeless favorite; they’re packed with wholesome ingredients that let you indulge without an ounce of guilt. What sets my No-Bake Vegan Peanut Butter and Jelly Bars apart from others on the internet is their simplicity and the way they echo those cherished childhood memories. They’re a delightful blend of chewy oats, creamy peanut butter, and vibrant fruit jam, allowing each bite to transport you back to simpler days.
Join me in the kitchen as we make these delicious bars together. I promise by the end of this journey, you’ll learn how easy it is to whip up a batch of No-Bake Vegan Peanut Butter and Jelly Bars that will not only satisfy your sweet tooth but also warm your heart!
What Are No-Bake Vegan Peanut Butter and Jelly Bars?
The delightful No-Bake Vegan Peanut Butter and Jelly Bars have their roots in classic American comfort food—but expertly tailored for today’s health-conscious lifestyle. These bars boast a chewy texture with a creamy topping that composes a perfect symphony of flavors. The nutty richness of the peanut butter combines harmoniously with the fruity sweetness of your jam flavor of choice, creating an irresistible, more wholesome rendition of the childhood classic.
They are unique not only because they require zero baking but also because of their customizable nature. Whether you prefer strawberry, raspberry, or even a funky flavor like blackberry, the possibilities are endless! Plus, they’re a fantastic option for those busy afternoons when you need a quick snack on the go or as a packed school lunch treat.
Why You’ll Love This Recipe
Simplicity at Its Best: These No-Bake Vegan Peanut Butter and Jelly Bars come together with just a handful of wholesome ingredients, making them incredibly easy to whip up on a busy day. If you’re a novice in the kitchen, have no fear! No culinary expertise is needed—just mix, press, and freeze.
Cost-Effective: Homemade always wins in the wallet department! You’ll find that whipping these bars together will cost you significantly less than store-bought organic snacks. Plus, they’re free of preservatives and artificial ingredients, giving you full control over what’s in your food.
Total Customization: If you have specific dietary needs or just want to play around with flavors, this recipe is the ultimate canvas! Feel free to swap out the peanut butter for almond or cashew butter. You could even replace the traditional fruit jam with a homemade chia jam using seasonal fruits for an extra nutrient boost!
Kid-Approved Snack: If your kiddos are anything like mine, they will absolutely devour these bars! I’ve seen picky eaters light up at the sight of these delicious treats, making them a perfect solution when you’re searching for healthier snacks.
Make Ahead & Freeze: These bars can be made in advance and stored in the freezer, making them the perfect grab-and-go snack. You can even create a large batch to have on hand for those sweet cravings throughout the week!
Ingredients Section
Essential Ingredients:
- 1 packed cup of soft Medjool dates, pitted: Make sure to choose really soft dates for optimal texture. If using Deglet dates, soak them in hot water for 15-20 minutes to soften.
- 2 3/4 cups rolled oats: Ensure they’re certified gluten-free if necessary. Oats form the base of the bars!
- 1/2 cup smooth, drippy peanut butter (no-sugar-added): Look for an all-natural brand without any additives. My personal favorite is Justin’s Creamy Peanut Butter.
- 3 tablespoons pure maple syrup: Sweetness with a touch of depth! Opt for grade A or B maple syrup depending on your preference.
- 2 teaspoons pure vanilla extract: This elevates the flavor profile delightfully.
- 1/2 teaspoon fine sea salt: A little salt heightens sweetness, so don’t skimp!
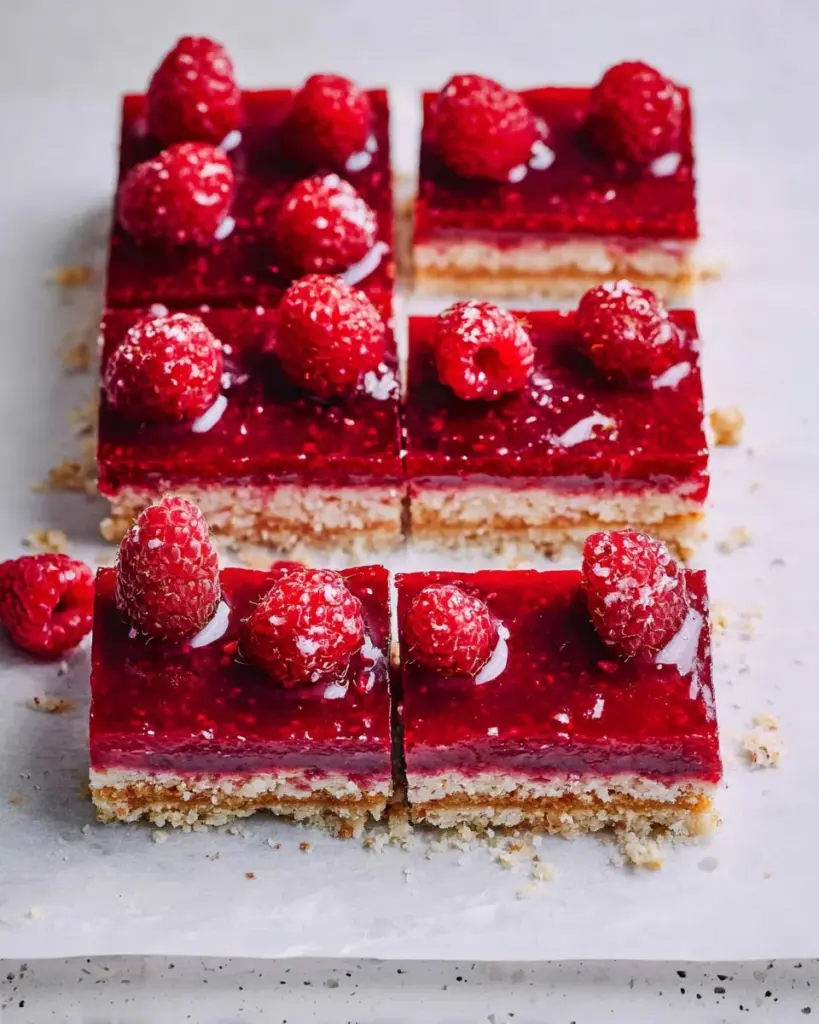
- 4-6 ounces of your favorite raspberry or strawberry jam: Go for high-quality jam; I adore St. Dalfour’s for its natural approach.
Notes on Ingredient Quality/Substitutions:
- For nut-free options, swap peanut butter for sunflower seed or soy nut butter.
- You can also experiment with other types of sweeteners like agave or date syrup for a different flavor profile.
Step-by-Step Instructions
Let’s jump into creating our No-Bake Vegan Peanut Butter and Jelly Bars! Follow these detailed steps for the best results:
Prep Your Dates: If your Medjool dates aren’t incredibly soft, cover them with hot water and let them sit for about 5 minutes. Then, drain and pat dry. If using Deglet dates, soak them for 15-20 minutes to soften before proceeding.
Make Oat Flour: Place the rolled oats in your food processor and pulverize them until they resemble a fine oat flour. This is the base of your bars!
Combine Ingredients: Add the pitted dates, peanut butter, maple syrup, vanilla extract, and salt into the oat flour. Pulse everything until you have a sticky dough. If it feels too dry, add a teaspoon of your favorite plant-based milk or maple syrup, one spoonful at a time, until it can hold together when pressed.
Chill the Dough: If the mixture is overly sticky, chill it in the fridge for about 20 minutes to firm it up a bit.
Prepare Your Pan: Line an 8×4 or 9×5-inch loaf pan with parchment paper. Spread the dough evenly into the pan, smoothing the top with a spatula.
Set It Up: Place the pan in the freezer for about 30 minutes to allow the bars to firm up completely.
Warm the Jam: While the bars are setting, warm your chosen jam in a saucepan over medium-low heat—just enough to make it pourable.
Spread the Jam: Carefully remove the bars from the freezer and pour the warm jam over the top. Use a spatula to spread it evenly.
Final Freeze: Return the pan to the freezer for 15 minutes to allow the jam to set.
Slice & Serve: Once set, slice into bars or squares and enjoy! Store any leftovers in the freezer for later snacking.
Chef’s Tips:
- For a beautiful presentation, drizzle some melted dark chocolate over the top of each bar right before serving!
- Avoid overprocessing the oats—you want a nice crumbly texture, not a powder.
Common Mistakes to Avoid:
- Using dates that are too dry can lead to a crumbly mixture; ensure your Medjool dates are soft.
- Be careful not to overheat your jam; you want it pourable, not bubbling.
Expert Tips & Tricks
Here are some of my favorite tips to help you achieve the most delightful No-Bake Vegan Peanut Butter and Jelly Bars:
Storage Recommendations: Keep your bars stored in an airtight container in the freezer. They can last up to 2 months—if they make it that long!
Make-Ahead Instructions: These bars are perfect for meal prep! Dedicate some time on the weekend to make a batch to enjoy throughout the week.
Troubleshooting: If your bars feel too crumbly when sliced, next time, slightly increase the amount of peanut butter or maple syrup. Conversely, if they’re too sticky, try chilling the dough longer before slicing.
Flavor Experimentation: Don’t hesitate to mix in different spices like cinnamon, nutmeg, or even a scoop of protein powder for an added health boost!
Presentation Matters: To make your bars Instagram-worthy, garnish with fresh berries or sprigs of mint before serving!
Serving Suggestions
Pair your No-Bake Vegan Peanut Butter and Jelly Bars with a fresh fruit salad or a creamy coconut yogurt for a complete snack experience! Looking for presentation ideas? Cut the bars into fun shapes using cookie cutters for a playful touch at a birthday party or family gathering. They’re also a perfect grab-and-go option for picnics or school lunches!
Variations & Substitutions
Flavor Combinations: Get creative! Use almond butter with a spiced apple jam for a fall-inspired treat, or swap in chocolate-hazelnut spread for a decadent twist.
Dietary Adaptations: If you’re following a raw diet, make sure to use raw peanut butter and homemade jam without added sugar.
Seasonal Variations: Use seasonal fruits to create jam during berry season, or incorporate sliced bananas and chia seeds into the dough for a tropical version!
Nutrition & Storage Info
- Prep Time: 15 minutes
- Cook Time: 0 minutes (no baking!)
- Total Time: 1 hour (30 minutes chill time + 15 minutes jam prep)
- Yield: About 10 servings (depending on how you slice them)
- Estimated Calories: Approximately 150 calories per serving
Storage Instructions:
- Room Temperature: Not recommended for more than a few hours.
- Fridge: Lasts up to 1 week.
- Freezer: Best stored and lasts up to 2 months.
FAQ Section
Can I use a different type of nut butter?
Yes, any nut or seed-based butter works as a substitute! Just check for any allergens.Is there a nut-free option?
Absolutely! Sunflower seed butter is a fantastic alternative.Can I make these bars gluten-free?
Simply ensure you use certified gluten-free oats.How can I adjust the sweetness?
Feel free to add more or less maple syrup based on your taste preference.How do I store leftovers?
Store them in an airtight container in the freezer for the best preservation.What if my bars are too crumbly?
They may need more binding ingredients. Try adding a little extra nut butter or maple syrup.Can I use dried fruits instead of jam?
Yes, finely chopped dried fruits can make delicious variations!Is it necessary to freeze them?
Freezing helps set them properly, but if you prefer a softer bar, you may chill them instead.How can I make these bars more decadent?
Drizzle melted dark chocolate or serve with a creamy dip!Can I include protein powder?
Absolutely! Just be mindful of the moisture balance; you may need to add more liquid.
Conclusion
These No-Bake Vegan Peanut Butter and Jelly Bars encapsulate everything we love about nostalgic childhood treats while delivering a wholesome and convenient snack. Their delightful fusion of flavors, creamy texture, and customizable options make them a winner in any household. So, why not give this recipe a try? I’d love to know if your family enjoys them as much as mine does!
And don’t forget to check out some of my other easy, delicious recipes on the blog! Your feedback and comments are always welcome—let’s embark on this delicious journey together!
Print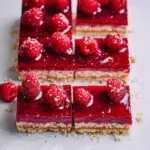
No-Bake Vegan Peanut Butter and Jelly Bars
- Total Time: 60 minutes
- Yield: 10 servings 1x
- Diet: Vegan
Description
A healthier twist on the classic peanut butter and jelly sandwich, these no-bake bars are made with wholesome ingredients to satisfy your sweet cravings.
Ingredients
- 1 packed cup of soft Medjool dates, pitted
- 2 3/4 cups rolled oats
- 1/2 cup smooth, drippy peanut butter (no-sugar-added)
- 3 tablespoons pure maple syrup
- 2 teaspoons pure vanilla extract
- 1/2 teaspoon fine sea salt
- 4–6 ounces of your favorite raspberry or strawberry jam
Instructions
- If your Medjool dates aren’t incredibly soft, cover them with hot water and let them sit for about 5 minutes. Then, drain and pat dry.
- Place the rolled oats in your food processor and pulverize them until they resemble a fine oat flour.
- Add the pitted dates, peanut butter, maple syrup, vanilla extract, and salt into the oat flour. Pulse until you have a sticky dough.
- If the mixture is too dry, add a teaspoon of plant-based milk or maple syrup until it holds together.
- If overly sticky, chill the mixture in the fridge for about 20 minutes.
- Line an 8×4 or 9×5-inch loaf pan with parchment paper and spread the dough evenly.
- Freeze for about 30 minutes to allow the bars to firm up completely.
- While the bars are setting, warm your chosen jam in a saucepan until pourable.
- Pour the warm jam over the top of the bars, spreading it evenly with a spatula.
- Return the pan to the freezer for 15 minutes to allow the jam to set.
- Once set, slice into bars or squares and enjoy!
Notes
These bars can be stored in an airtight container in the freezer for up to 2 months. For a beautiful presentation, drizzle with melted dark chocolate before serving.
- Prep Time: 15 minutes
- Cook Time: 0 minutes
- Category: Snack
- Method: No-Bake
- Cuisine: American
Nutrition
- Serving Size: 1 bar
- Calories: 150
- Sugar: 10g
- Sodium: 100mg
- Fat: 7g
- Saturated Fat: 1g
- Unsaturated Fat: 6g
- Trans Fat: 0g
- Carbohydrates: 24g
- Fiber: 3g
- Protein: 3g
- Cholesterol: 0mg
Keywords: no-bake, vegan, peanut butter, jelly, bars, snack, dessert, healthy