How to Grow Microgreens: Your Guide to Fresh Flavor at Home
Have you ever walked into a kitchen and been hit by the fresh scent of vibrant greens? I vividly remember my grandmother’s small, sunlit kitchen overflowing with tiny pots filled with sprouts, each one more colorful than the last. Those microgreens were not just tiny salads; they were bursts of flavor that transformed our meals, taking simple dishes to another level of brilliance. As a food blogger passionate about bringing fresh ingredients to your table, I’m excited to share with you how to grow microgreens right at home.
Microgreens are not your average sprouts. These miniature greens pack a nutritional punch and a burst of flavor that make them unique—their tastes are surprisingly intense, often much stronger than their mature counterparts. What’s so special about growing your own? It’s all about family memories and the joy of nurturing something from seed to sprout.
In this guide, I promise you’ll learn everything from the best types of seeds to use, to detailed step-by-step instructions. You’ll gain the confidence to cultivate your personal garden of microgreens, making your meals not only healthier but also infused with love and creativity.
What Are Microgreens?
Microgreens have a rich history, often considered the precursors to their fully-grown plant counterparts. Typically harvested just after the first leaves, they are packed with nutrients and have become a staple in fine dining and everyday cooking alike. Think of them as nature’s little flavor explosions!
The taste and texture of these greens vary across the spectrum—from crispy arugula to peppery radish greens. When you pop them in your mouth, you’ll be greeted with a refreshing crunch paired with a burst of flavor, making them an irresistible addition to salads, sandwiches, and even soups.
So when should you make microgreens? Whether you’re looking to elevate your lunch, spruce up a dinner party, or even just nibble on something fresh while scrolling through your phone, microgreens are a versatile option that you can sprout year-round.
Why You’ll Love This Recipe
Here are five compelling reasons why you’ll be head-over-heels for this how to grow microgreens guide:
Freshness Guaranteed: Imagine plucking fresh greens from your own kitchen, knowing exactly how they were grown. Forget the store-bought versions that wilt after a day; with homegrown microgreens, you can enjoy crisp, vibrant greens whenever you want!
Cost-Effective: You can cultivate your own microgreens for just a fraction of the cost of store-bought varieties. A small investment in seeds can give you a harvest that’s worth its weight in gold!
Customization to Your Heart’s Content: Want a little extra spice? Choose radish seeds! Craving mild and sweet? Go for sunflower or pea shoots. The choice is yours, and you can mix and match based on your palate and preference.
Simplicity: Growing microgreens is not rocket science! Even if you consider yourself a black thumb, with just a few steps, some water, and sunlight, you can easily grow your own greens.
Quick Turnaround: In as little as 10 days, you can go from seed to salad! Talk about instant gratification—perfect for those of us who can’t wait too long for our culinary creations.
Ingredients
To embark on your microgreen-growing adventure, here’s what you’ll need:
- 2 tablespoons sprouting seeds: Choose from broccoli, radish, kale, chard, arugula, cilantro, chia, or buckwheat. Each option brings its own unique flavor and nutrients.
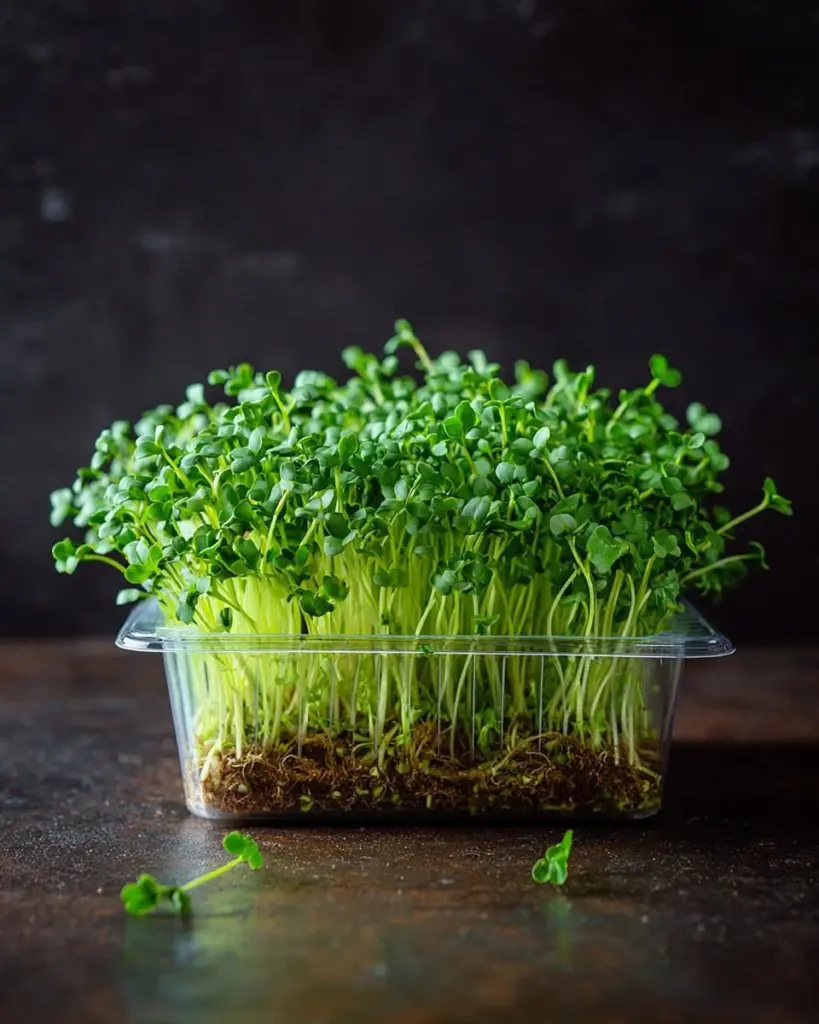
- 5" x 7" inch container with lid: Alternatively, you can use plastic wrap or a beeswax wrap.
- 5" x 7" inch growing mat: This will help retain moisture and support your seeds.
- Water: The essence of life—make sure it’s clean and preferably filtered.
- A sunny window: Natural sunlight is key for healthy growth.
Ingredient Quality Notes: Go for organic seeds when possible. Your taste buds—and your body—will thank you!
Prep Notes:
- Ensure the growing mat is allowed to soak before use for optimal moisture retention. Room temperature water is best.
Brand Recommendations:
- My go-to for seeds is Johnny’s Selected Seeds; their variety is exceptional and organic!
Step-by-Step Instructions
Day 1: Start by soaking your seeds according to the package direction for 6-8 hours. This step activates the seeds and helps in germination. After soaking, drain the seeds thoroughly.
Day 1: While the seeds are soaking, take your growing mat and soak it until it’s quite wet. Place the soaked mat in your container as a moisture-retaining base.
Day 1: Spread the drained seeds evenly over the mat, ensuring they’re not overlapping too much. Cover the container tightly with the lid or plastic wrap if a lid isn’t available.
Days 1-5: Place the container near a window where it can receive indirect sunlight. Inspect daily to make sure your seeds are staying damp but not soggy.
Day 5: When most seeds have sprouted, you may remove the cover. Water your microgreens lightly every day, and watch in delight as they grow for an additional 7-10 days.
To Harvest: Cut off the greens at the base using kitchen scissors as you need them.
Storage:
Make sure to store any microgreens you can’t use right away in a sealed zip-lock bag with a damp paper towel in the fridge for up to 5-7 days. They’ll continue to stay fresh and vibrant!
Chef’s Tips:
- Visual Cues: When your sprouts reach about 2-3 inches tall, they’re ready to use!
- Common Mistakes: Be careful not to overwater; damp is good, but soggy can lead to mold.
- Professional Techniques: Rotate your container daily for even light exposure, ensuring all greens grow evenly.
Expert Tips & Tricks
Want to ensure your microgreens are the envy of your friends? Here are some expert tips:
Choose Your Seeds Wisely: Opt for seeds specifically labeled for microgreens—they tend to produce the best flavor and growth.
Quality over Quantity: Invest in high-quality growing mats and containers. They help maintain the necessary moisture levels.
Mind the Light: If your window doesn’t get enough sunlight, consider supplementing with a grow light to boost growth.
Don’t Rush the Harvest: Sometimes, microgreens taste even better when allowed to grow a few extra days. Give them a chance!
Storage Mastery: Keep your microgreens in a well-ventilated space in the fridge. The more air circulation, the better they’ll last.
Make-ahead Magic: Sprouting multiple trays means you can stagger your harvest and enjoy fresh greens consistently!
Serving Suggestions
Microgreens are incredibly versatile and can be served alongside nearly any meal. Toss a handful into your morning omelet, sprinkle them on your favorite sandwich, or use them as a vibrant garnish atop soups. For a beautiful presentation, serve them in a small bowl or on a rustic cutting board alongside complementary items like artisan bread and local cheeses.
Ideal occasions for microgreens include brunches, lunch gatherings, or even a cozy dinner with family. They create an inviting atmosphere and show off your culinary creativity!
Variations & Substitutions
Feel free to experiment with different flavor combinations! Combine spicy radish microgreens with the sweetness of pea shoots for a delightful contrast. For a milder mix, stick with sunflower and broccoli.
You can also adapt your recipe based on dietary restrictions—microgreens are naturally vegan and gluten-free! Take advantage of seasonal variations by trying different sprouting seeds available at your local market.
Nutrition & Storage Info
- Prep Time: 10 minutes
- Soaking Time: 6-8 hours (prep ahead!)
- Grow Time: 10-15 days total for best results
- Yield: Approximately 2-3 servings
- Estimated Calories per Serving: Roughly 10-20 calories, depending on the variety.
Storage Instructions:
- Room Temp: Not recommended; they need moisture.
- Fridge: Keep in a sealed bag with damp paper towels; lasts 5-7 days.
- Freezer: Not recommended, as it can change the texture.
FAQ Section
Can I grow microgreens without a growing mat?
- Yes! You can use soil or even paper towels in a pinch, but using a mat provides excellent support.
Do I need special equipment?
- Not at all! If you have a container and a sunny window, you’re good to go.
How much sunlight do microgreens need?
- They love bright, indirect sunlight. Aim for a spot that gets at least 4-6 hours a day.
Why are my microgreens growing so slowly?
- This could be due to a lack of light, too much water, or possibly the temperature being too low.
Can I grow microgreens indoors?
- Absolutely! They thrive indoors as long as they receive adequate light.
What can I do with leftover seeds?
- Store them in a cool, dry place. They can last for several months if kept sealed.
Are microgreens more nutritious than mature greens?
- Many studies suggest that microgreens contain higher nutrient densities compared to mature vegetables.
Can I grow them outdoors?
- Yes, but be mindful of temperature and weather conditions. Indoor growth offers more consistent results.
How often should I water them?
- Water them daily, but keep the moisture levels balanced—wet but not soggy.
Can I eat microgreens raw?
- Yes! They’re delicious raw and can add freshness to salads, sandwiches, and more.
Conclusion
Growing microgreens is a fulfilling journey that leads to fresh, nutritious ingredients you can incorporate into your everyday meals. Plus, there’s something incredibly special about nurturing a plant from seed to sprout. I encourage you to give it a try!
I would love to hear your feedback in the comments—what varieties did you pick? How did they turn out? And, don’t forget to check out related recipes on my blog that pair beautifully with your homegrown greens. Let’s continue to elevate our meals together!
Print
How to Grow Microgreens
- Total Time: 10 days
- Yield: 2-3 servings 1x
- Diet: Vegan
Description
Learn how to grow your own microgreens at home for a splash of flavor and nutrition in your meals.
Ingredients
- 2 tablespoons sprouting seeds (broccoli, radish, kale, chard, arugula, cilantro, chia, or buckwheat)
- 5“ x 7″ inch container with lid
- 5“ x 7″ inch growing mat
- Water
- A sunny window
Instructions
- Soak seeds according to package directions for 6-8 hours, then drain thoroughly.
- Soak the growing mat until wet, then place it in the container.
- Spread the drained seeds evenly over the mat and cover with a lid or plastic wrap.
- Place the container in indirect sunlight and check daily to keep the seeds damp.
- After 5 days, remove the cover; water lightly every day for 7-10 days until ready to harvest.
- Cut off the greens at the base using kitchen scissors as needed.
Notes
Store unused microgreens in a sealed zip-lock bag with a damp paper towel in the fridge for up to 5-7 days.
- Prep Time: 10 minutes
- Cook Time: 0 minutes
- Category: Gardening
- Method: Soaking and Growing
- Cuisine: Vegetable
Nutrition
- Serving Size: 1 serving
- Calories: 15
- Sugar: 0g
- Sodium: 1mg
- Fat: 0g
- Saturated Fat: 0g
- Unsaturated Fat: 0g
- Trans Fat: 0g
- Carbohydrates: 3g
- Fiber: 1g
- Protein: 1g
- Cholesterol: 0mg
Keywords: microgreens, home gardening, healthy eating, sprouting seeds, fresh greens