How to Cure Olives: Your Ultimate Guide to Perfectly Seasoned Olives at Home
Growing up, my grandmother had a knack for transforming simple ingredients into culinary treasures that filled our home with warmth and love. One of my fondest memories is standing beside her, eagerly watching as she would prepare her signature cured olives. The savory aroma wafting through the air didn’t just whet my appetite; it was a reminder of family gatherings, laughter, and stories shared over lovingly prepared meals. When it comes to how to cure olives, there’s something undeniably personal and satisfying about crafting a jar of these flavorful delights yourself.
What makes cured olives so special, you ask? It’s more than just the unique briny taste and satisfying texture. Each bite transports you to sun-drenched Mediterranean landscapes, evoking feelings of relaxation and indulgence. Plus, my method is not just another recipe; it’s a tried-and-true process developed through years of experimentation and love. Rather than relying on store-bought options filled with preservatives, I’ll guide you through curing olives using natural ingredients, bringing a taste of authenticity to your table.
In this guide, you’ll learn the intricacies of how to cure olives at home, complete with expert tips and personal anecdotes. By the end, you’ll not only have delicious olives ready to share with family and friends but also cherished memories created in the process.
What Are Cured Olives?
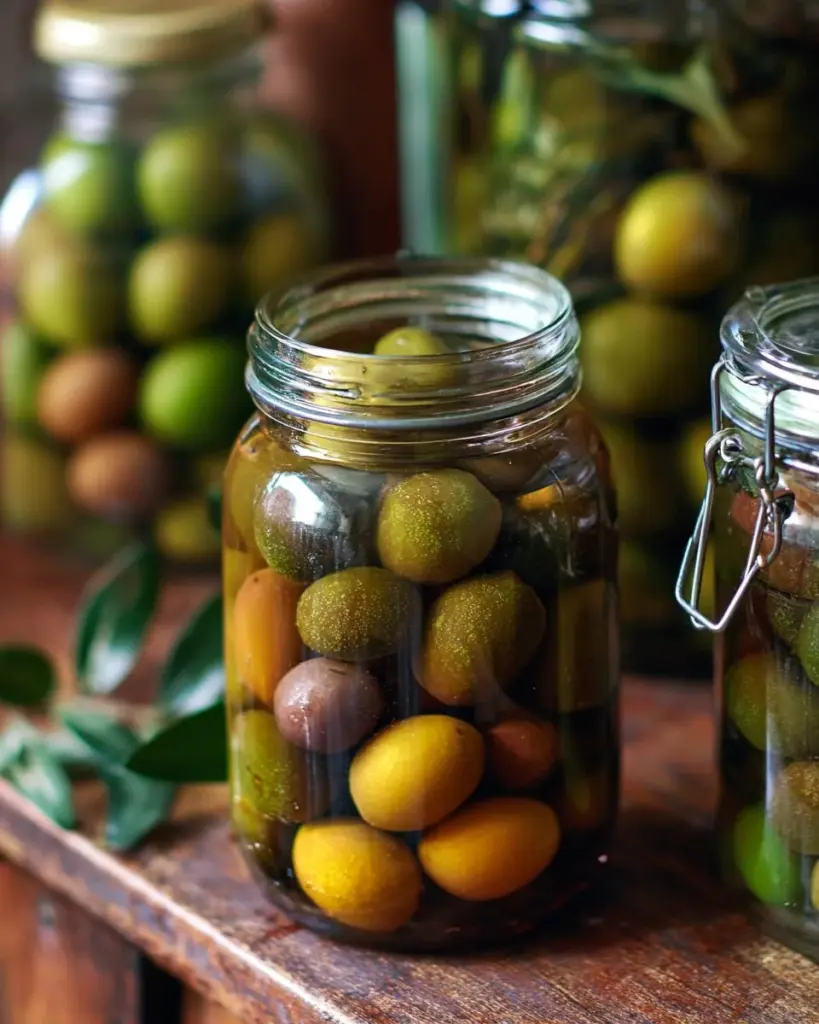
Cured olives are simply olives that have been treated to remove their natural bitterness, resulting in a tangy, flavorful snacking experience. The practice of curing olives dates back thousands of years, originating in the Mediterranean region, where olives have been harvested and cherished since ancient times. The process of curing typically involves soaking the olives in a sodium hydroxide (lye) solution, followed by washing and soaking in water, and finally marinating in salt brine to enhance the flavor.
The taste of cured olives is complex and delightful. They have a distinct briny flavor that can range from mildly sweet to robustly salty, depending on the curing method and any additional ingredients used. The texture is firm yet tender, making them perfect for snacking, adding to salads, or serving on charcuterie boards.
You might wonder when the best time to cure olives is. Well, if you have access to fresh olives during the harvest season (typically late summer to early fall), that’s prime time! But don’t let a lack of fresh olives stop you—cured olives are delicious year-round, and making them at home allows you to enjoy their unique flavors whenever you like.
Why You’ll Love This Recipe
The Freshness Factor: There’s no comparing the taste of freshly cured olives to the mass-produced ones sitting on grocery shelves. With each bite, you’ll unlock flavors that taste like sunshine and earth—the ultimate way to elevate your meals.
Cost-Effectiveness: Curing olives at home saves you money in the long run. While a jar of gourmet olives might cost upwards of $10 or more, you can create a batch of your homemade cured olives for a fraction of that price!
Customization Galore: Want rosemary with a touch of garlic? How about a hint of lemon zest for brightness? When you learn how to cure olives, you create your masterpiece! Tailor the flavors to your unique palate and culinary adventures.
Difficulty Level: Don’t let the lye intimidate you; this recipe is fairly straightforward. With just a bit of patience and passion, you’ll achieve impressive results. I’ve made this recipe countless times, and each batch improves my confidence in the kitchen.
Memorable Experiences: Curing olives is not just a cooking project; it’s an experience. Gather your loved ones, share laughter, swap stories, and create magical memories while you prep your olives.
Let’s admit it—once you give this recipe a try, you may just find yourself hooked!
Ingredients Section
To embark on your journey of how to cure olives, gather the following ingredients:
- 4 cups mature green olives (I recommend using Castlevetrano or Super Colossal Sevillanos for their superb flavor and texture)
- 3 tablespoons food-grade sodium hydroxide (lye), divided (make sure it’s food-grade!)
- Water (enough for soaking and rinsing)
- Salt (essential for the brining process)
- Optional additions: Feel free to get creative with herbs (like oregano or thyme), garlic, or lemon zest for a personalized touch.
Notes on Ingredient Quality:
- Olives: Choose firm, fresh olives with no blemishes for the best results. Visiting a farmer’s market or specialty store is excellent for finding high-quality options.
- Sodium Hydroxide (Lye): Ensure you use food-grade lye. I like Mason’s Lye as it’s reliable and well-reviewed.
- Salt: A good quality sea salt is recommended for the brine solution as it adds depth to the flavor.
Prep Notes: All your ingredients should be at room temperature, and make sure to have all the necessary equipment ready before you begin!
Step-by-Step Instructions
Step 1: Rinse the Olives
Rinse the olives under running water to ensure any dirt or debris is removed. Place them in a large crock, glass, or porcelain jar or bowl.
Step 2: First Soak
Mix 1 tablespoon of lye with 1 quart of water until dissolved. Carefully pour this solution over the olives, ensuring they are fully submerged. Soak for 12 hours.
Step 3: Second Soak
Drain the olives, then prepare another lye solution using the same ratio (1 tablespoon lye to 1 quart water). Pour this fresh solution over the olives and soak for an additional 12 hours.
Chef’s Tip: Check the largest olive by cutting it open. If the lye hasn’t reached the pit, you may need to repeat the soaking process for another 12 hours. Remember to drain and rinse thoroughly afterward!
Step 4: Rinse & Soak
Once you’re confident the olives have cured, soak them in fresh cold water. Change the water three or more times a day for the next four days.
Step 5: Taste Test
After four days, taste an olive to ensure there is no lingering lye flavor. If it’s too bitter, soak longer in back in fresh water.
Step 6: Salt Brine Soak
Prepare a salt brine by mixing 6 tablespoons salt with 1 gallon of water. Soak the olives in this solution for three days, adding optional ingredients like garlic, herbs, or lemon zest for extra flavor.
Step 7: Storage
The olives are ready to eat! You can keep them in the brine in a cool, dark place, preferably in the refrigerator. For the best flavor, consume within two months.
Expert Tips & Tricks
Use Safety Precautions: Remember to wear gloves and goggles when handling lye; safety first!
Storage Recommendations: After curing, store your olives in a sealed jar in the fridge. They can last for up to two months in the brine.
Make-Ahead Instructions: Cured olives improve with time as the flavors develop; consider making a batch ahead for your next gathering.
Troubleshooting: If your olives taste too salty, reduce the brining time. If they lack flavor, consider soaking longer in the brine or adding more herbs.
Taste As You Go: Don’t hesitate to sample your olives during the process. That way, you can make adjustments to achieve the flavor you desire.
Serving Suggestions
Cured olives are incredibly versatile and make a wonderful addition to any meal or gathering. Serve them alongside cured meats, cheeses, and fresh bread on a beautiful charcuterie board. You can also toss them into salads or pasta dishes for a burst of flavor, or simply snack on them as a savory treat.
For an elegant presentation, add them to a small bowl garnished with fresh herbs and a drizzle of olive oil. They’re perfect for casual gatherings and holiday feasts alike!
Variations & Substitutions
Don’t hesitate to get creative with your cured olives! Here are some variations you might consider:
- Spicy Kick: Add crushed red pepper flakes or chopped jalapeños for a delightful heat.
- Herb-Infused: Use your favorite herbs like thyme, rosemary, or basil to enhance the flavors.
- Citrusy Twist: Experiment with different citrus flavors such as orange zest or lime juice for a bright note.
- Dietary Adaptations: For a low-sodium option, use less salt during the brining process and adjust according to taste.
Nutrition & Storage Info
- Prep Time: 30 minutes (not including soaking durations)
- Cook Time: 20 minutes (active time)
- Total Time: Approximately 7 days (including curing and brining)
- Yield: Approximately 2 cups of cured olives
- Estimated Calories per Serving: 50 calories (for a ¼ cup serving)
Storage Instructions
- Store cured olives in the brine in the refrigerator. They last up to two months.
FAQ Section
Why do I need to use lye to cure olives?
- Lye helps to remove the natural bitterness from olives, ensuring a palatable flavor.
Are there alternatives to using lye?
- Yes, you can brine olives in a salt solution, but this process takes longer and may not remove all bitterness.
Can cured olives spoil?
- If properly stored in the refrigerator, they can last for a couple of months. Signs of spoilage include off smells or sliminess.
Can I use black olives for this recipe?
- Yes, experimentation is encouraged! The flavor and texture may differ depending on the type of olives used.
What should I do if my olives are too bitter after curing?
- If bitterness persists, soak them in fresh water longer or try adding more salt to the brine.
Do I really need to change the soak water multiple times?
- Yes! This step is crucial for removing lye and ensuring your olives taste delicious without an unpleasant aftertaste.
Can I adjust the salt levels in the brine?
- Absolutely! Adjust according to your taste preference, but be cautious—over-brining can lead to inedible olives.
What is the best way to serve cured olives?
- They’re fantastic on their own, in salads, on charcuterie boards, or alongside grilled meats.
Can I freeze cured olives?
- It’s not recommended, as freezing may change their texture and flavor.
What’s the best way to store leftover brine?
- If you have extra brine, you can store it in a sealed jar in the refrigerator for up to a month and reuse it for future curing.
Conclusion
Curing olives at home is a rewarding culinary adventure that connects you to the cherished traditions of food crafting. Not only do you get to indulge in incredibly flavorful olives, but you also create lasting memories during the process. I encourage you to embrace this recipe—your taste buds (and your loved ones) will thank you!
If you’ve tried this recipe or have any thoughts to share, I’d love to hear from you in the comments! And be sure to check out my other recipes on the blog for even more delicious homemade delights. Happy curing!
Print
How to Cure Olives
- Total Time: 10080
- Yield: 2 cups 1x
- Diet: Vegetarian
Description
A comprehensive guide to curing olives at home using natural ingredients for a unique flavor.
Ingredients
- 4 cups mature green olives (e.g., Castlevetrano or Super Colossal Sevillanos)
- 3 tablespoons food-grade sodium hydroxide (lye), divided
- Water (for soaking and rinsing)
- Salt (for brining)
- Optional additions: herbs (like oregano or thyme), garlic, lemon zest
Instructions
- Rinse the olives under running water to remove any dirt.
- Mix 1 tablespoon of lye with 1 quart of water and pour it over the olives. Soak for 12 hours.
- Drain the olives and prepare another lye solution. Soak for an additional 12 hours.
- Rinse and then soak olives in fresh cold water, changing the water three times a day for the next four days.
- Taste an olive to check for bitterness; soak longer if needed.
- Mix 6 tablespoons of salt with 1 gallon of water for brine. Soak olives in this solution for three days.
- Store olives in the brine in a cool place or refrigerator. Consume within two months for best flavor.
Notes
Ensure to wear gloves and goggles when handling lye. Olives improve with time, so consider making them ahead for gatherings.
- Prep Time: 30
- Cook Time: 20
- Category: Condiment
- Method: Curing
- Cuisine: Mediterranean
Nutrition
- Serving Size: 1/4 cup
- Calories: 50
- Sugar: 0g
- Sodium: 300mg
- Fat: 5g
- Saturated Fat: 1g
- Unsaturated Fat: 4g
- Trans Fat: 0g
- Carbohydrates: 3g
- Fiber: 1g
- Protein: 1g
- Cholesterol: 0mg
Keywords: cured olives, Mediterranean, home cooking, preservation, olives