Crispy Rice Bites: Irresistibly Crunchy Delights You Can’t Resist!
Do you ever find yourself reminiscing about that one family gathering where everything felt just right? The laughter, the delicious aromas wafting through the air, and, of course, the comfort food that had everyone gathered around the table. For me, one dish stands out above the rest: Crispy Rice Bites! These delightful morsels remind me of summer evenings at my grandma’s house, where we would indulge in sushi, and I’d sneak bits of leftover rice, frying them up to create the perfect crispy treats.
What makes my recipe for Crispy Rice Bites special? Unlike the versions you might find in restaurants, my creation is all about fresh ingredients and a sprinkle of love. And believe me, there’s nothing quite like that satisfying crunch followed by the burst of umami flavors as you savor each bite.
In this post, you will learn how to recreate this family favorite with simple steps and tips, ensuring you can share this nostalgic dish with your loved ones. So, are you ready to stock your pantry and bring back those cozy memories? Let’s dive into making the best Crispy Rice Bites you’ve ever tasted!
What Are Crispy Rice Bites?
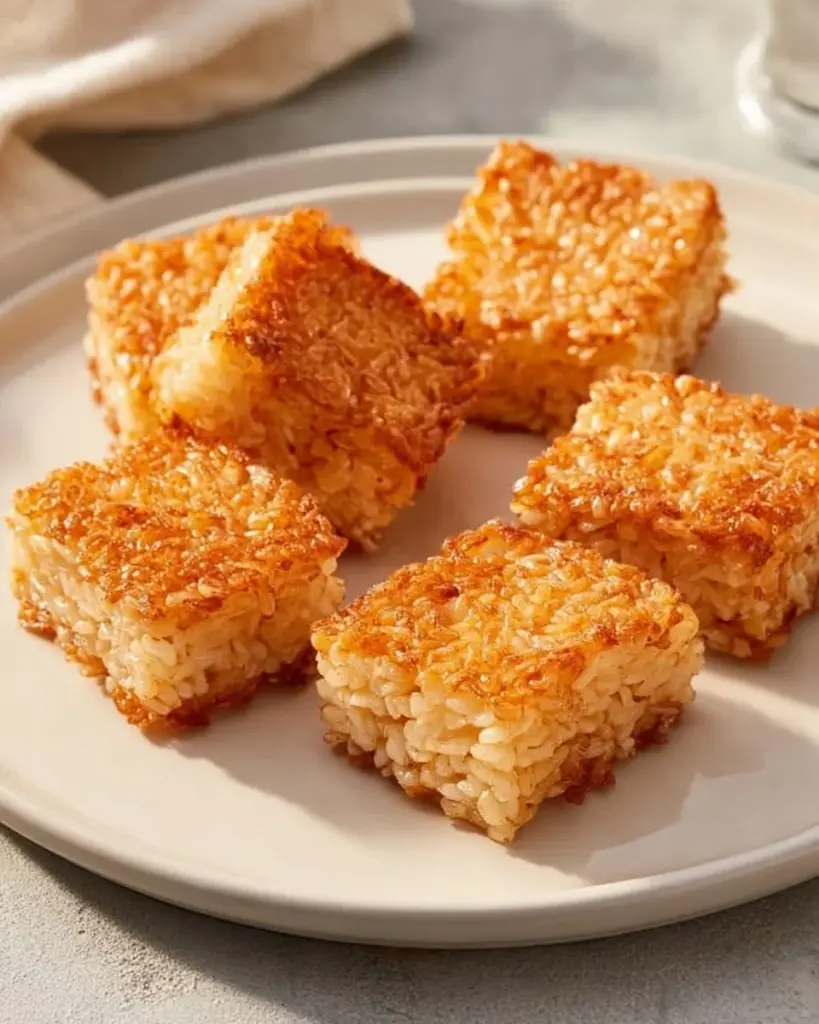
Crispy Rice Bites, or sushi rice cakes, are a delightful fusion of flavors and textures that have made their way into the hearts of many. Originating from the Japanese culinary tradition, these bites are typically made from short-grain sushi rice—which is known for its sticky, tender nature—allowing it to hold together beautifully. When fried, they achieve a golden-brown crust that offers an irresistible crunch, while the inside remains soft and chewy.
What makes them unique is the endless variety of toppings you can add, transforming simple rice into a gourmet treat. Whether you go with decadent avocado and spicy tuna or classic crab and scallions, these bites are all about personalization. Perfect for parties, family gatherings, or just a cozy night in, Crispy Rice Bites are versatile and always a crowd-pleaser.
Why You’ll Love This Recipe
Simplicity at Its Best: This recipe is surprisingly easy. With just a handful of ingredients, you can whip together a delicious appetizer in under 30 minutes. Who wouldn’t love that?
Cost-Effective: Why spend a fortune at sushi restaurants when you can make these delightful bites at home? Cooking them yourself is not only satisfying but also much lighter on your wallet.
Customization Galore: You have the power to personalize these bites! Craving something spicy? Add sriracha to your topping. Want a vegetarian option? Load them up with fresh veggies and a drizzle of soy sauce. The sky’s the limit!
Healthier Alternative: While you can certainly indulge, you can also control the ingredients and portions to make these bites healthier than their takeout counterparts.
Crowd Favorite: Nothing brings people to the table faster than the sound of crispy fried goodies! Serve these bites at your next gathering and watch them disappear in a flash.
Ingredients
2 cups cooked short-grain sushi rice
(Use high-quality sushi rice, preferably from brands like Nishiki or Koshihikari for the best texture.)1 tablespoon soy sauce
(For a gluten-free option, consider using tamari.)1 teaspoon sesame oil
(Enhances flavor; look for toasted sesame oil for an extra layer of richness.)1/4 teaspoon salt
(Adjust to taste, especially if your soy sauce is saltier.)Vegetable oil for frying
(Look for oils with a high smoke point, like canola or peanut oil, for the best frying experience.)Your favorite sushi toppings
(Consider creamy avocado, fresh crab, spicy tuna mix, or vibrant scallions to elevate your crispy rice bites.)
Prep Notes: Ensure your cooked sushi rice is at room temperature for easy mixing. Also, it’s helpful to have your toppings prepped and ready to go before frying the rice bites.
Step-by-Step Instructions
Mixing the Ingredients: In a mixing bowl, combine the cooked sushi rice with 1 tablespoon of soy sauce, 1 teaspoon of sesame oil, and 1/4 teaspoon of salt. Stir gently until everything is well combined. The soy sauce should slightly color the rice, creating a lovely savory base.
Chef’s Tip: Use your hands to mix if it’s easier, just make sure your hands are clean!
Shaping the Rice: With damp hands (this prevents sticking), shape the rice mixture into small, flat cakes about ½ inch thick. Aim for uniform shapes so they cook evenly.
Heating the Oil: In a frying pan, heat about 1/2 inch of vegetable oil over medium heat. You want the oil hot enough that a drop of water sizzles when it hits the surface.
Frying: Carefully place a few rice cakes in the hot oil, making sure not to overcrowd the pan. Fry for 3-4 minutes on each side, or until they are golden brown and crispy.
Visual Cue: The edges should start to bubble and turn a lovely brown.
Draining: Once cooked, use a slotted spoon to remove the crispy rice bites and drain them on paper towels.
Serving: Serve the crispy rice bites warm, topped with your choice of sushi toppings, and don’t forget a drizzle of soy sauce on the side for dipping!
Common Mistake to Avoid: Don’t flip them too early; let them get nice and crispy on one side before turning.
Expert Tips & Tricks
Quality Matters: Use the freshest short-grain sushi rice for the best results. It’s the foundation of your bites, after all!
Make Ahead: You can prepare the rice mixture and shape the cakes a few hours ahead—just cover them with a damp cloth to keep them moist.
Storage Tips: Uncooked rice cakes can be stored in an airtight container in the fridge for up to a day. Once fried, enjoy them fresh, as they are best consumed immediately. However, if you have leftovers, store them in the fridge for up to 2 days.
Troubleshooting: If your rice cakes are falling apart, make sure your rice is sticky enough and consider adding a bit more sesame oil to help bind them.
Make it Vegan: Swap the soy sauce for a gluten-free alternative and skip the seafood toppings for a delicious plant-based option!
Serving Suggestions
Crispy Rice Bites make fantastic appetizers or party snacks. Pair them with a refreshing cucumber salad drizzled in rice vinegar or a tangy miso dipping sauce to elevate the experience. Presentation matters, so consider serving them on a vibrant platter garnished with sesame seeds or microgreens for that Instagram-worthy shot! Great for game day, casual get-togethers, or a cozy dinner at home, these bites will wow your guests every time.
Variations & Substitutions
Flavor Combinations: Explore fun combinations! Try adding diced jalapeños for a spicy kick or fresh herbs like cilantro for a burst of freshness.
Dietary Restrictions: Gluten-free individuals can easily swap out traditional soy sauce with tamari or coconut aminos, making this recipe enjoyable for everyone.
Seasonal Variations: In the fall, why not incorporate roasted butternut squash or caramelized apples as toppings? For summer gatherings, grill some peaches or pineapple to enliven your bites!
Nutrition & Storage Info
- Prep Time: 10 minutes
- Cook Time: 15 minutes
- Total Time: 25 minutes
- Yield: Approximately 8 servings (depending on cake size)
- Estimated Calories: Approximately 150 calories per serving (including toppings).
Storage Instructions:
- Room Temperature: Best served immediately after frying.
- Fridge: Store leftovers in an airtight container for up to 2 days.
- Freezer: These are best eaten fresh, but you can freeze un-fried rice cakes for up to a month and fry them directly from the freezer.
FAQ Section
Can I use regular rice instead of sushi rice?
- While you can use other types of rice, sushi rice is best due to its sticky texture, which helps the cakes hold together when frying.
What if I don’t have sesame oil?
- You can use any neutral oil or skip it altogether, but the sesame oil adds a distinct flavor that enhances the dish.
Can I bake these instead of frying?
- Yes! Bake them at 400°F (200°C) for about 20-25 minutes for a healthier option, flipping halfway through.
How do I know when the oil is hot enough to fry?
- You can test it by dropping a small piece of rice into the oil. If it sizzles and rises to the surface, it’s ready!
What toppings do you recommend?
- Think fresh and colorful! Avocado, spicy tuna, crab, or even pickled ginger are fantastic choices.
Can these be made in advance?
- You can prepare the rice mixture ahead of time and even shape the cakes. Just fry them when you’re ready to serve!
What can I serve as a dipping sauce?
- A soy sauce-based dip, spicy mayo, or even a sweet chili sauce pairs beautifully with the crispy bites.
How do I prevent the rice from sticking to my hands?
- Wetting your hands slightly can help prevent sticking while shaping the rice cakes.
Is it possible to make these gluten-free?
- Absolutely! Just make sure to use tamari instead of soy sauce, and you’re set!
What’s the best way to reheat leftovers?
- While they’re best fresh, you can reheat them in a frying pan over medium-low heat for 3-4 minutes on each side to regain their crispiness.
Conclusion
These Crispy Rice Bites are more than just a recipe; they’re a delightful way to connect with family and friends while indulging your taste buds. I hope you give this recipe a try and experience the crunch and flavor that makes them so special. I’d love to hear your thoughts—did your family enjoy them? Please share your experiences in the comments! And while you’re here, check out other delicious bites on the blog that will charm your gatherings. Happy cooking, my fellow food enthusiasts!