Irresistible Classic Cast Iron Cornbread: A Family Favorite Recipe
There’s something truly magical about the aroma of freshly baked cornbread wafting through the air, isn’t there? I remember standing next to my grandmother in her kitchen, patiently waiting for our Classic Cast Iron Cornbread to emerge from the oven. As the golden-brown crust crackled and the sweet scent enveloped us, we knew that comfort was just a slice away. This beloved recipe has been in my family for generations, a cherished staple at every holiday gathering and Sunday dinner.
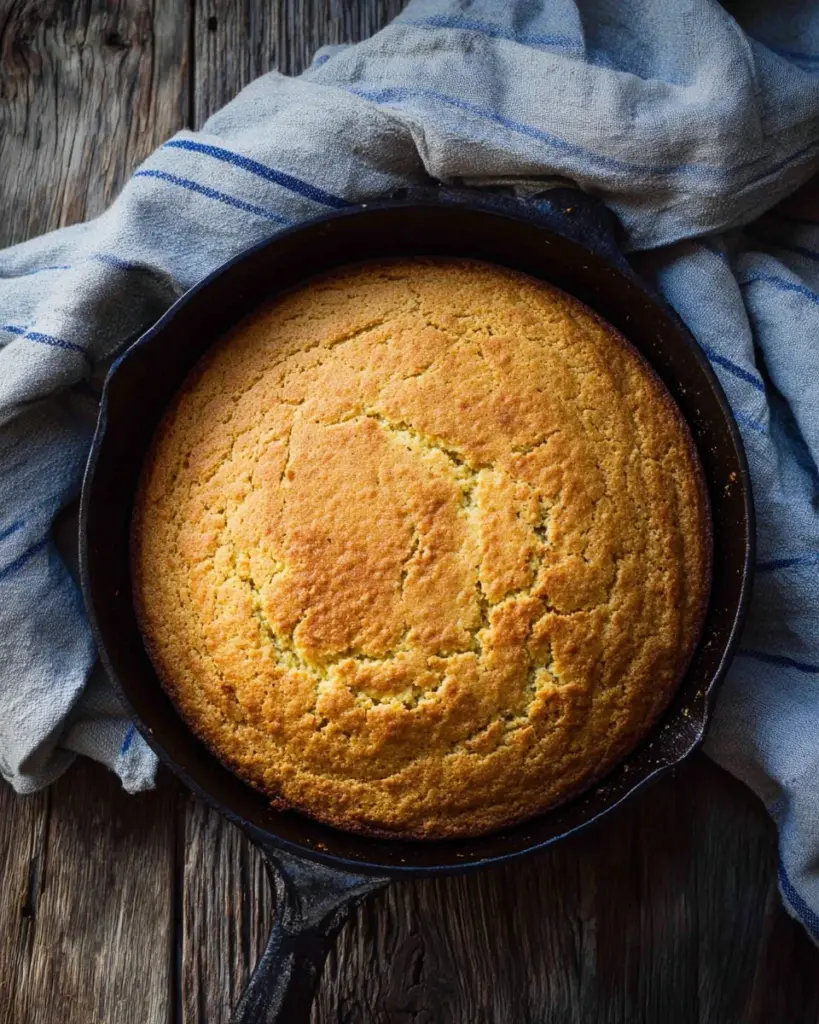
What makes my Classic Cast Iron Cornbread stand out from the rest is not just the use of a trusty cast iron skillet, but the love and care that goes into every single ingredient. It’s the perfect balance of crispy edges and a tender, buttery crumb that wraps you in warmth and nostalgia. Unlike the store-bought versions that often fall flat, this homemade cornbread promises a burst of flavor that will have you craving seconds (or thirds!).
In this recipe, you’ll discover the secret to achieving that perfect texture, along with a few tips that will elevate your cornbread game. So, roll up your sleeves and get your apron on—I promise, you’re about to delight your family and friends with a Classic Cast Iron Cornbread they won’t soon forget!
What Are Classic Cast Iron Cornbread?
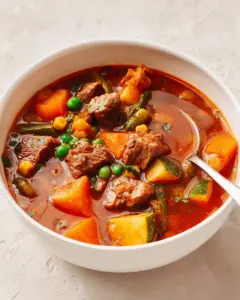
Dating back to the culinary traditions of Native Americans, cornbread has evolved into a beloved comfort food across the United States. Classic Cast Iron Cornbread is characterized by its crispy crust and soft, fluffy center, making it an ideal companion for hearty soups, chili, or even served alongside a simple salad.
The unique qualities of cornbread come from the use of cornmeal, which lends its signature flavor and a delightful texture. When baked in a cast iron skillet, the cornbread develops a glorious crust while remaining moist and tender inside. It’s a dish that’s perfect for any occasion, from casual family dinners to festive gatherings—who wouldn’t want a slice of homemade happiness?
Whether you’re a seasoned baker or a novice in the kitchen, this timeless recipe is perfect for anyone looking to bring a taste of tradition to their table. Prepare it for brunch, a barbecue, or simply as a cozy side dish, and experience the magic and comfort that only Classic Cast Iron Cornbread can offer!
Why You’ll Love This Recipe
Easy to Make: You don’t need to be a baking expert to whip up this cornbread. With straightforward ingredients and minimal steps, you’ll feel like a pro in no time!
Cost-Effective: Homemade cornbread is not only tastier than store-bought, but it’s also a more economical choice. With just a few pantry staples, you can create an entire batch that outshines any pricey restaurant version.
Customization Galore: One of the best things about this recipe is its versatility! Add jalapeños for a spicy kick, cheddar cheese for extra richness, or even fresh herbs for a seasonal twist. The possibilities are endless!
Unbeatable Flavor: Nothing compares to the aroma of freshly baked cornbread wafting through your kitchen. This recipe guarantees a mouthwatering taste that will make you forget all about the boxed versions.
Ideal for Meal Prep: Whether you’re hosting a gathering or meal prepping for the week, this cornbread stores beautifully. You can easily reheat it for a quick snack or side dish later!
With just a bit of time and love, you can create a batch that’ll have everyone begging for the recipe. Trust me; once you try this Classic Cast Iron Cornbread, there’s no turning back.
Ingredients
To create this delectable Classic Cast Iron Cornbread, you’ll need the following ingredients:
1/2 cup unsalted butter (I prefer using Kerrygold for its rich flavor)
- For a dairy-free option, olive oil or melted coconut oil works beautifully!
1 cup medium grind cornmeal (yellow cornmeal provides the best flavor)
- If unavailable, fine grind cornmeal will work, but the texture may be slightly different.
1 cup all-purpose flour (I recommend King Arthur Flour for its quality)
- For a gluten-free version, try using a 1:1 gluten-free flour blend.
1 teaspoon baking powder
1/2 teaspoon baking soda
1 teaspoon sea salt (Maldon sea salt adds a delightful crunch)
1 tablespoon honey (or maple syrup for a vegan option)
2 eggs (or a flax egg for a vegan substitute)
1 1/4 cup buttermilk (I use store-bought, but homemade buttermilk works great with milk and vinegar! Substitute with yogurt, kefir, or even regular milk if necessary.)
Prep Notes
- Make sure your butter is at room temperature for easier mixing.
- If you didn’t have time to take your eggs or buttermilk out of the fridge, just warm them gently in a bowl of warm water for a few minutes.
Step-by-Step Instructions
Preheat your oven to 400°F (200°C) and place a 9 to 10-inch cast iron skillet in the oven to heat up. This step is crucial for the crispy edges we all love!
In a medium-sized bowl, whisk together the cornmeal, flour, baking powder, baking soda, and salt until well combined.
After about 8 minutes, carefully remove the hot skillet from the oven. Add the butter and let it melt completely, then pour the melted butter into a bowl, leaving a bit in the skillet to coat the bottom.
In the bowl with the melted butter, whisk in the honey, buttermilk, and eggs until fully incorporated.
Gently mix the dry ingredients into the wet ingredients, stirring just until combined. Be careful not to overmix! Pour the mixture into the hot, buttered skillet.
Bake for 20-25 minutes, or until the edges pull away from the pan and the center is slightly puffed up and golden brown. A toothpick inserted into the center should come out clean.
For substitutions, mix 3/4 cup yogurt with 1/2 cup water to make a buttermilk substitute. To create a delightful honey butter, whisk together 1/4 cup soft butter with 2 tablespoons honey and a pinch of salt and pepper.
Store any leftovers in an airtight container at room temperature. To reheat, pop it in the oven at 350°F for 5-10 minutes.
Chef’s Tip: For a vegan version, substitute the eggs with 1 tablespoon of ground flaxseed mixed with 2.5 tablespoons of water (let sit for 5 minutes to thicken), and replace the buttermilk with any plant-based alternative.
Expert Tips & Tricks
Use a preheated skillet: The key to that perfect crust is starting with a hot skillet—don’t skip this step!
Measure accurately: A kitchen scale can help ensure that you’re adding the right proportions, resulting in a more consistent and tender cornbread.
Don’t overmix: Overmixing can lead to a dense cornbread. Stir just until the dry ingredients are incorporated.
Make ahead: You can prepare the dry ingredients ahead of time and store them in an airtight container for easy cornbread baking later.
Storage: This cornbread stays fresh at room temperature for up to two days; after that, refrigerate it for up to a week or freeze for up to three months.
Troubleshooting: If your cornbread is too dense, consider using less flour or using finer cornmeal for a fluffier texture. If it’s too crumbly, you may need to add an extra egg or more buttermilk.
Serving Suggestions
Classic Cast Iron Cornbread is incredibly versatile and pairs beautifully with many dishes. Serve it alongside a warm bowl of chili, a hearty vegetable soup, or grilled meats for a satisfying meal. For an enticing presentation, slice it into wedges and serve warm with a dollop of that homemade honey butter I mentioned earlier. Whether it’s a cozy family dinner or a festive gathering, this cornbread is sure to be a crowd-pleaser.
Variations & Substitutions
Feeling adventurous? Here are some fun twists to make this Classic Cast Iron Cornbread your own:
- Savory Options: Stir in shredded cheese, diced jalapeños, or cooked bacon for a savory kick.
- Sweet Twist: Add blueberries, cranberries, or a dash of cinnamon for a sweet and fruity version.
- Seasonal Variations: Incorporate fresh herbs like rosemary or thyme in the summer. Pumpkin cornbread in the fall can be a delightful seasonal treat!
If you have specific dietary restrictions, there are plenty of substitutes available to accommodate your needs, ensuring everyone can enjoy this comforting dish.
Nutrition & Storage Info
- Prep Time: 10 minutes
- Cook Time: 25 minutes
- Total Time: 35 minutes
- Yield: 8 servings
- Estimated Calories: Approximately 200 calories per serving
- Storage: Store at room temperature for up to 2 days, in the refrigerator for 1 week, or freeze for 3 months.
FAQ Section
Can I use frozen cornmeal?
- Absolutely! Just make sure to let it come to room temperature before using.
What if I don’t have cast iron?
- You can use any oven-safe baking dish, but the results might vary slightly.
How do I know when the cornbread is done?
- It should be golden brown on top, and a toothpick inserted in the center should come out clean.
Can I make this cornbread gluten-free?
- Yes! Use a gluten-free flour blend instead of regular flour.
What can I serve with cornbread?
- It pairs wonderfully with chili, soups, barbecue, or even salads!
How do I store leftovers?
- Keep it in an airtight container at room temperature for up to 2 days, or in the fridge for longer storage.
Why is my cornbread dry?
- Overbaking or not enough moisture can lead to dryness. Make sure to follow the recipe closely!
Can I add spices?
- Definitely! Consider adding cumin, smoked paprika, or even a pinch of cayenne for added flavor.
Is there a vegan version?
- Yes! Follow the vegan modifications mentioned in the recipe for a delicious plant-based option.
Can I freeze cornbread?
- Yes! Just store it in an airtight container or freezer bag, and it should last for up to 3 months.
Conclusion
Classic Cast Iron Cornbread is a beloved recipe that brings warmth and nostalgia to any table. The blend of flavors, paired with its delightful texture, makes it a must-try for both seasoned bakers and newcomers alike. I encourage you to give it a go and make your own cherished memories in the kitchen. Don’t forget to leave a comment with your feedback or any modifications you tried—I love hearing from you! Plus, be sure to check out my other cornbread variations and comfort food recipes if you’re looking to keep the family favorites coming!
Happy baking, my friends! 🍞❤️
Print
Classic Cast Iron Cornbread
- Total Time: 35 minutes
- Yield: 8 servings 1x
- Diet: Vegetarian
Description
A timeless recipe for Classic Cast Iron Cornbread, featuring a crispy crust and tender crumb, perfect for any occasion.
Ingredients
- 1/2 cup unsalted butter
- 1 cup medium grind cornmeal
- 1 cup all-purpose flour
- 1 teaspoon baking powder
- 1/2 teaspoon baking soda
- 1 teaspoon sea salt
- 1 tablespoon honey
- 2 eggs
- 1 1/4 cup buttermilk
Instructions
- Preheat your oven to 400°F (200°C) and place a 9 to 10-inch cast iron skillet in the oven to heat up.
- In a medium-sized bowl, whisk together the cornmeal, flour, baking powder, baking soda, and salt until well combined.
- Carefully remove the hot skillet from the oven after 8 minutes. Add the butter and let it melt completely, then pour it into a bowl, leaving some in the skillet to coat the bottom.
- In the bowl with melted butter, whisk in honey, buttermilk, and eggs until fully incorporated.
- Gently mix the dry ingredients into the wet ingredients, stirring just until combined. Pour the mixture into the hot, buttered skillet.
- Bake for 20-25 minutes, or until edges pull away from the pan and center is golden and puffy. A toothpick inserted should come out clean.
- Let cool slightly before slicing and serve warm.
Notes
For a vegan version, substitute the eggs with ground flaxseed and replace buttermilk with plant-based alternatives.
- Prep Time: 10 minutes
- Cook Time: 25 minutes
- Category: Side Dish
- Method: Baking
- Cuisine: American
Nutrition
- Serving Size: 1 serving
- Calories: 200
- Sugar: 5g
- Sodium: 300mg
- Fat: 10g
- Saturated Fat: 6g
- Unsaturated Fat: 4g
- Trans Fat: 0g
- Carbohydrates: 28g
- Fiber: 2g
- Protein: 4g
- Cholesterol: 60mg
Keywords: cornbread, cast iron, comfort food, easy recipe, vegetarian